


Why a Free Blog With a Custom Domain Beats a Free Subdomain (2025)
Launching a brand-new site on a free subdomain (yourname.platform.com) is tempting, but in 2025, the smarter move is to start a free blog and connect your own custom domain (yourname.com). It’s the difference between building a brand you own and renting space with limited trust, weaker SEO, and fewer growth options. With BlogBowl, you can create your own blog free, connect a custom domain in minutes, and grow faster with built‑in AI automation - no coding needed.
What you’ll build in this guide
A fast, professional blog you can start free
Connected to your own custom domain (yourname.com) for brand trust and SEO
HTTPS security, analytics, and newsletter - all set up without coding
Why custom domain > free subdomain
Branding and memorability
Own your name and reputation, not a platform’s URL.
Clean, short links like yourname.com/post-title beat long subdomain chains.
Trust and conversions
Professional email at your domain (you@yourname.com) increases replies and sign‑ups.
SSL/HTTPS on your own domain reduces warnings, boosts credibility, and improves conversion rates.
SEO advantages
Canonical control and clean URL structures help pages rank more consistently.
Better eligibility for rich results and knowledge panels versus diluted signals on a shared subdomain.
Easier link-building: partners prefer linking to a brand-owned domain.
"Create original, comprehensive content that provides substantial value and is produced with care." - Source
How this guide is different (vs. competitor tutorials)
Free‑first, modern setup
Clear DNS + SSL steps so you can launch a free blog with a custom domain quickly.
Platform‑agnostic tips + BlogBowl fast path
We’ll show universal best practices and an accelerated path using BlogBowl’s domain integration and 60‑second launch.
Built‑in automation that compounds growth
AI article generation, automatic internal linking, integrated analytics, and a newsletter - no extra plugins or patchwork tools required.
What you need before starting
20–30 minutes, a domain (or plan to buy one), and an idea you care about
Optional: brand colors/logo inspirations
Outcome
You’ll walk away with a live, secure blog on your custom domain - ready to publish, promote, and scale. Along the way you’ll learn how to create your own URL structure, start a free blog with professional foundations, and set up the essentials (SSL, analytics, and email) without touching code.
Step 1: Choose a Niche, Name, and Secure Your Domain
Pick a niche you can write about consistently
Solve a recurring problem, document a journey, or serve a community (examples: “No‑code SaaS growth,” “Bootstrapping an AI app,” “Healthy recipes for busy founders”).
Aim for specificity first; you can broaden later. Tight focus helps you create your own blog free of distractions, publish consistently, and stand out on Google.
Quick test: If you can outline 25 post ideas in 20 minutes, you’ve likely found a sustainable niche.
Value angles that compound: tutorials, templates, benchmarks, FAQs, and case studies.
"Organic search accounted for approximately 53.3% of all trackable website traffic across industries." - Source
Name your blog (and future brand)
Keep it short, simple, and easy to spell (pass the “radio test”: say it once, they can type it).
Check social handles and trademarks:
Social: secure matching handles on X, LinkedIn, YouTube, and Instagram.
Trademarks: search USPTO (US) or TMview (EU) to avoid conflicts.
Prefer .com when available; quality alternatives: .io, .co, .dev, or a relevant ccTLD if brand‑fit.
Tip: Test three finalists with five ideal readers. Ask which name feels clear, trustworthy, and memorable - and why.
Secure your domain
Register via a reputable registrar (enable WHOIS privacy to protect your info).
Expect $8–$15/year for standard TLDs; your platform can remain free while you own the brand.
Turn on auto‑renew and domain lock to prevent accidental loss.
Plan for an email on your domain (you@yourname.com) to boost trust with subscribers and partners.
If you’ll start a free blog and connect later, buy the domain now - owning it early prevents name disputes and squatting.
Pro SEO considerations when naming
Avoid hyphens and numbers when possible (cleaner URLs and fewer typos).
Bias toward descriptive or associative words aligned with search intent (e.g., “growth,” “recipes,” “playbook,” “docs”).
Think ahead to category structure and URLs:
Example: yourname.com/category/post-title (short slugs, consistent casing).
Keep slugs human‑readable; remove stop words; prefer “/keyword-phrase/”.
Brand vs. exact match:
Brandable names scale better; you can rank with content quality and internal linking.
If you choose an exact‑match domain, ensure it’s still memorable and future‑proof.
Deliverable for this step
Your finalized domain (e.g., yourname.com) and a short tagline that explains what you do.
Template: “We help [audience] [achieve outcome] with [format or approach].”
Example: “We help SaaS founders grow organic traffic with AI‑written how‑tos and benchmarks.”
Ready to start a free blog with a custom domain? Once your domain is secured, you’re set to connect it, create your own URL structure, and launch fast - without coding.
Step 2: Pick Your Platform (Free) - Why BlogBowl + Alternatives
What to look for in a free blog platform with custom domain support
Custom domain mapping without complex setup
SEO‑ready, fast templates, clean HTML, and sitemaps
Built‑in analytics and newsletter (fewer tools to glue together)
Easy content management and multi‑author support
Why choose BlogBowl for a free start
Launch in under 60 seconds with SEO‑optimized, fast templates
Built‑in newsletter and privacy‑friendly analytics
AI automations: daily article drafts, keyword research, internal linking, embedded media, and unique images
Custom domain integration at no extra platform cost (domain registration billed by registrar)
Scales to unlimited blogs/changelogs/help docs as you grow
Credible alternatives you might consider (and trade‑offs)
Blogger: free hosting, custom domains, limited extensibility/design
WordPress.com (free tier): solid editor, custom domain requires mapping; fewer advanced SEO controls on free
GitHub Pages: completely free, but technical and less author‑friendly
Substack: easy newsletter‑first, custom domains available, limited layout control
Platform comparison
Platform | Custom Domain on Free Plan | Ease of Setup | SEO Controls | Monetization Options | Best For |
|---|---|---|---|---|---|
BlogBowl | Yes (mapping supported; registrar billed separately) | Very easy; launch in under 60s | Strong defaults; sitemaps, clean HTML, fast templates | Built-in newsletter, traffic growth automations; supports external affiliate/ads | SaaS teams, startups, creators who want SEO + automation |
Blogger | Yes | Easy | Basic | AdSense, affiliate links | Hobbyists who want simple and free |
WordPress.com (free) | Mapping requires upgrade; limited on free | Easy | Limited advanced controls on free | Paid upgrades, affiliate links | Beginners who may upgrade later |
GitHub Pages | Yes | Technical | Manual; developer-driven | External only (affiliate, sponsors) | Developers comfortable with Git/Markdown |
Substack | Yes (with plan) | Very easy | Limited page SEO controls | Subscriptions, paid newsletters | Writers focused on email-first growth |
Decision recap
If you want speed, SEO, and growth automation with zero code, choose BlogBowl.
If you’re experimenting or technical, consider alternatives - you can migrate later.
Deliverable for this step
Create your free BlogBowl account and pick a template that matches your brand vibe.
Step 3: Launch Your Free Blog on BlogBowl (60‑Second Setup)
Create your site
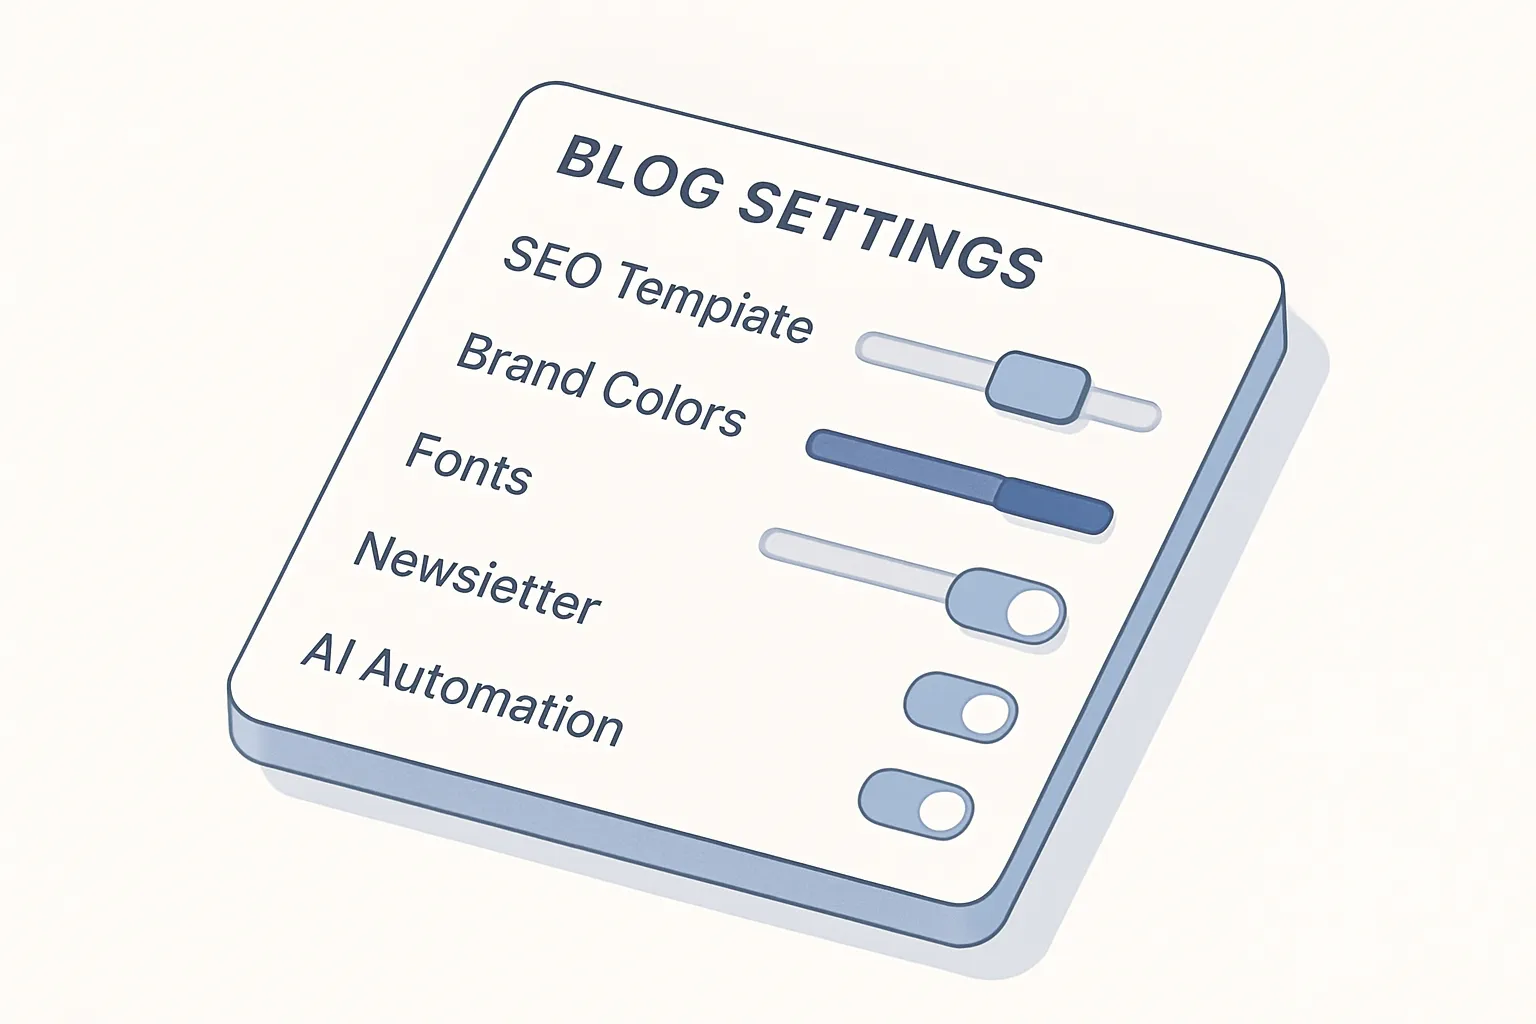
Sign up with email, name your blog, pick a fast SEO template
Choose colors and fonts that mirror your brand
Preview on desktop and mobile to ensure readability and contrast
Set essential settings before you publish
Site identity: set site title, meta description, time zone, and language
URL: configure your default blog URL (temporary subdomain) until the custom domain is connected
Growth: enable built‑in newsletter capture (footer + inline forms)
Performance: confirm sitemap is enabled and image compression is on
Optional AI automation (switch on now or later)
Daily draft posts in your niche (editable before publishing)
Automatic internal linking and related posts
AI‑generated images and embedded videos where relevant
Smart scheduling: queue drafts for consistent publishing cadence
Deliverable for this step
A styled, private‑by‑default blog ready to map to your domain.
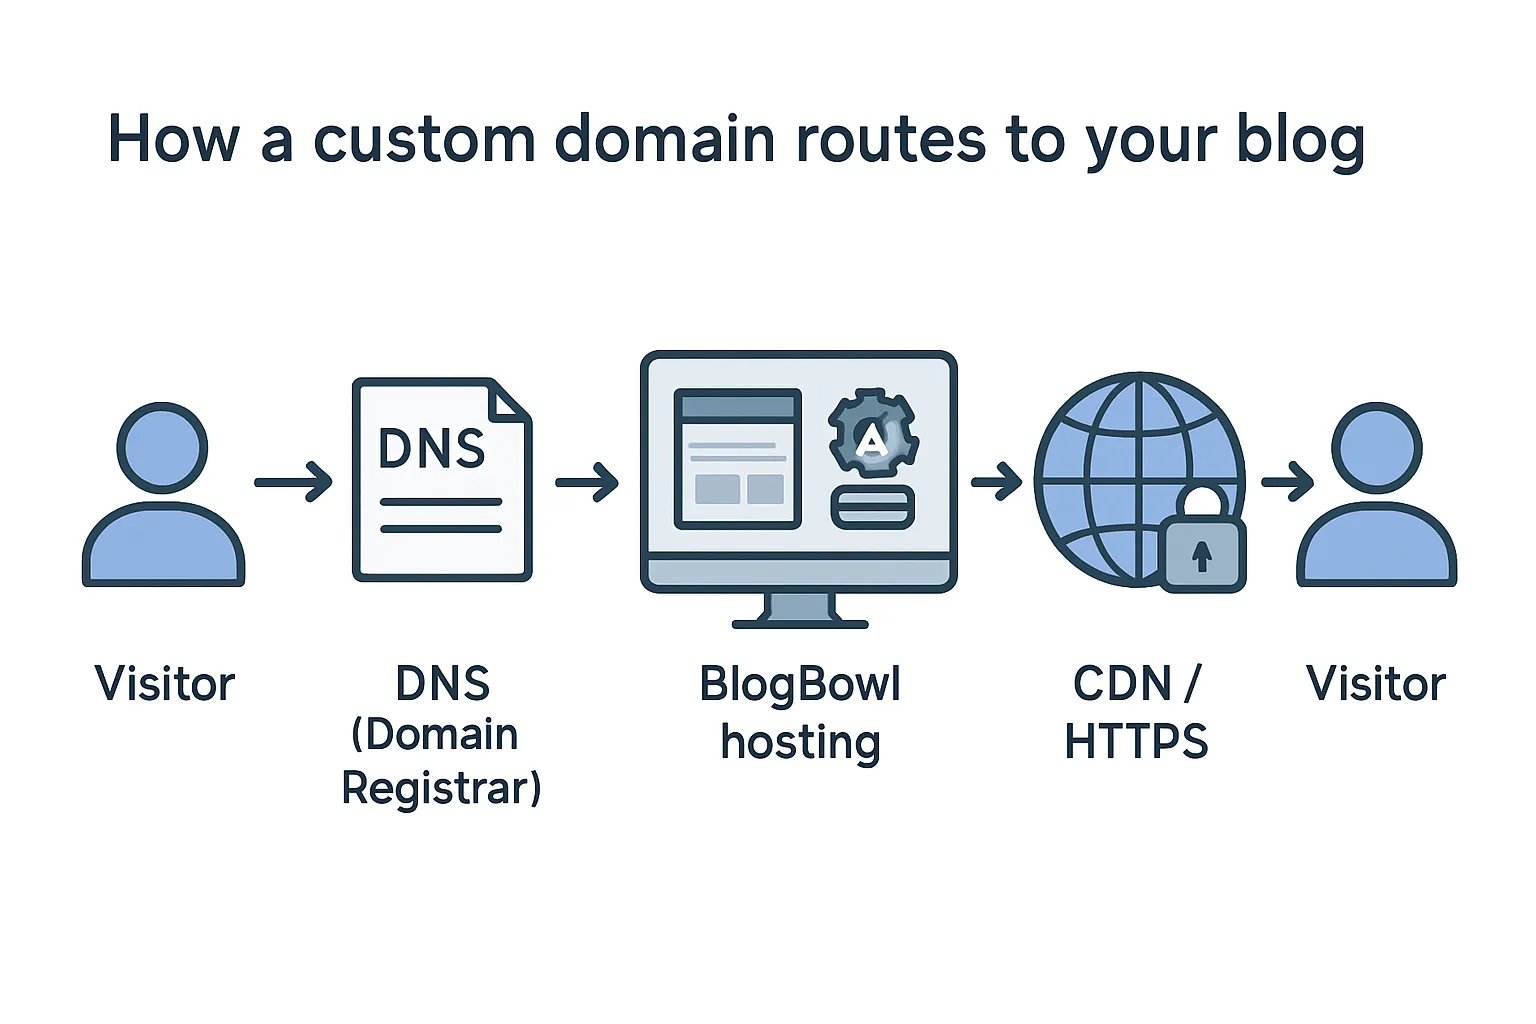
Step 4: Connect Your Custom Domain (DNS Settings Made Simple)
What you’ll do
Prove domain ownership and point DNS records to your blog
Decide on your canonical URL (www vs. non‑www) and set redirects
DNS quick primer
Records you’ll use: A/AAAA (root), CNAME (subdomains like www), TXT (verification)
Propagation: changes can take from minutes up to 24 hours
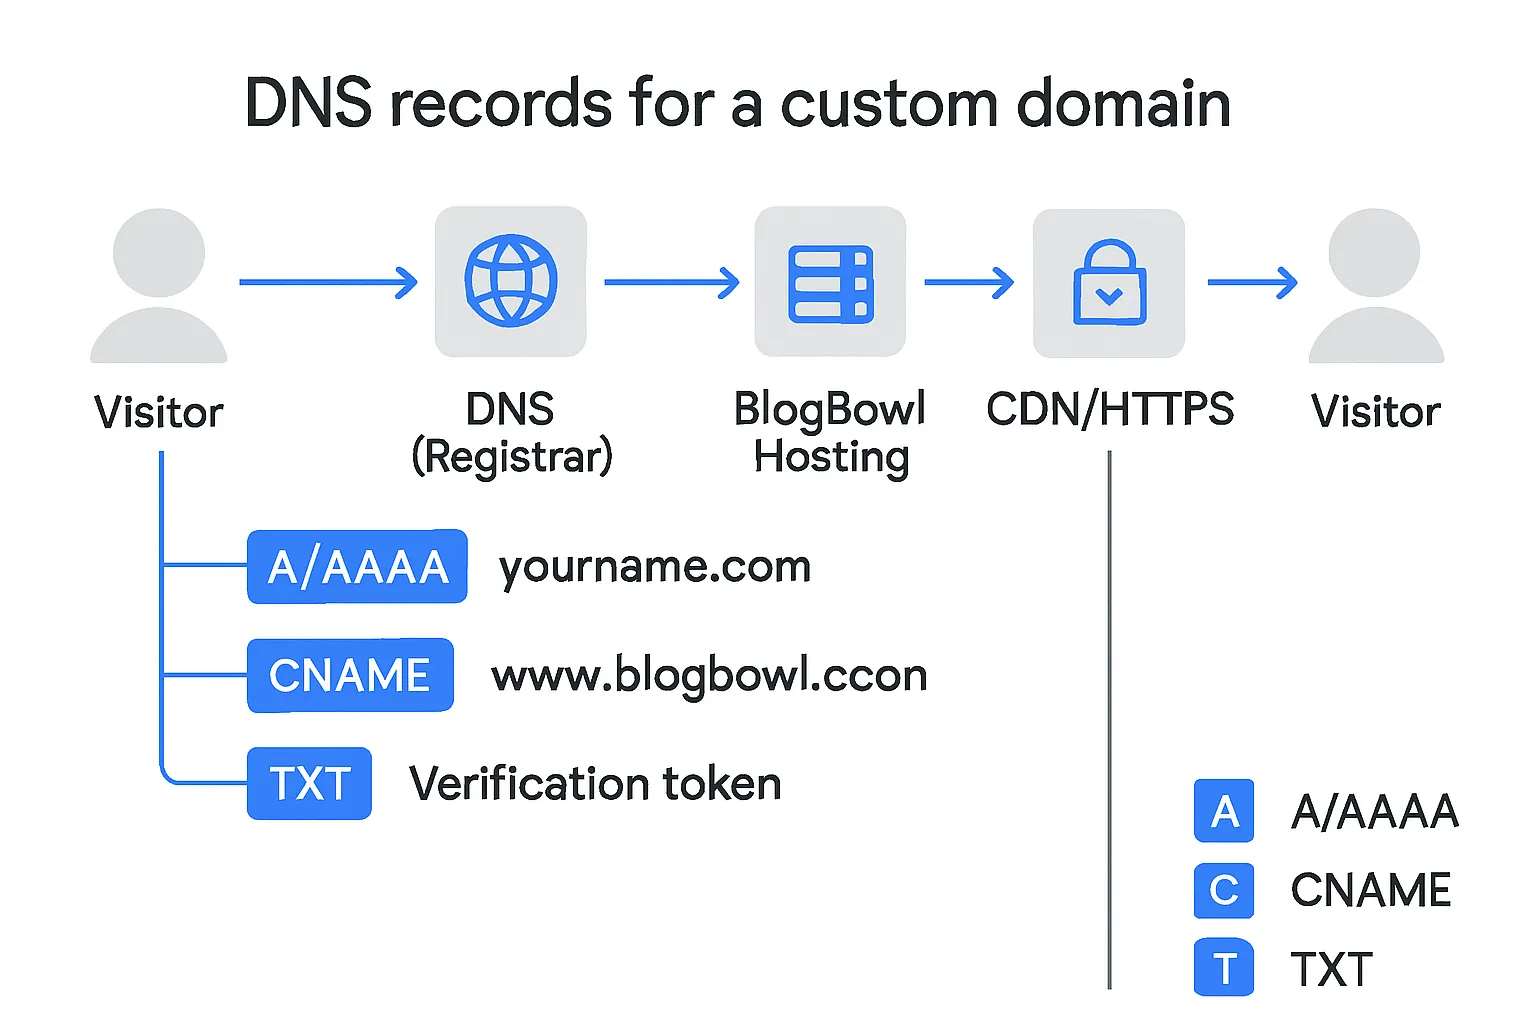
BlogBowl mapping (typical pattern)
Root (yourname.com): A/AAAA records to BlogBowl IPs (provided in dashboard)
www (www.yourname.com): CNAME to your BlogBowl canonical host
TXT record: domain verification token
If you’re testing another platform
Blogger: add the two CNAMEs provided + A records for root redirect to www
WordPress.com: add A/CNAME records per their docs; map domain in dashboard
"If you use CAA records on your custom domain, you must add letsencrypt.org, or SSL won’t be created or renewed." - Source
Common pitfalls to avoid
Conflicting old A records at the root
Cloudflare orange‑cloud proxy interfering with verification (temporarily gray‑cloud if needed)
Missing or mis‑scoped CNAME host (e.g., leaving off “www”)
Skipping TXT verification or using the wrong host field
DNS record cheat‑sheet
Host (root/www) | Record Type | Points To / Value | When to Use | Notes |
|---|---|---|---|---|
@ (root) | A | Your hosting IPv4 (e.g., 203.0.113.10) | Point apex/root domain to hosting | TTL 300–3600s; remove old/conflicting A records |
@ (root) | AAAA | Your hosting IPv6 (e.g., 2001:db8::10) | IPv6 support for apex/root | Optional if host provides; match provider guidance |
www | CNAME | your-canonical-host.example.com | Map www to platform host | Do not CNAME the root; ensure host is “www” |
@ or specific | TXT | Platform verification token (e.g., abc123...) | Verify domain ownership | Copy value exactly; TTL 300–1800s works well |
@ | TXT (CAA) | issue “letsencrypt.org” | Allow SSL issuance | Only if you manage CAA; add per platform guidance |
@ | TXT | v=spf1 include:your-email-provider -all | Email deliverability (SPF) | Add if you set up domain email later |
Deliverable for this step
Your domain pointed correctly and verification completed in the platform. Once propagation finishes, force‑refresh with HTTPS and confirm your canonical redirect (www ↔ non‑www) resolves to a single URL.
Step 5: Enable HTTPS, Redirects, and Canonicals
Turn on HTTPS (TLS)
Use the platform’s free SSL (e.g., Let’s Encrypt) and force HTTPS sitewide. BlogBowl issues and renews SSL automatically once your DNS is pointed correctly.
After SSL is active, enable “Force HTTPS” so every http request redirects to https.
Consider HSTS after confirming SSL is stable for a few days:
Add Strict-Transport-Security with a long max-age (e.g., 31536000), includeSubDomains, and optionally preload.
Only enable HSTS when you’re confident your SSL won’t lapse, as browsers will strictly require HTTPS.
Choose your canonical host
Pick www or non‑www as your primary host and 301‑redirect the other to it. Consistent canonicalization helps consolidate link equity and improves crawl efficiency.
Ensure sitemap URLs match your canonical preference (all entries should be https and either all www or all non‑www).
Verify that canonical tags on pages point to the chosen protocol and host.
Final DNS/SSL checks
Test redirection paths:
http://yourname.com → https://yourname.com (or https://www.yourname.com if that’s your canonical)
http://www.yourname.com → canonical https host
https://non‑canonical → canonical https host
Confirm there are no mixed‑content warnings (all images, scripts, and embeds should load over https).
Validate certificate chain and hostname match (no browser warnings).
Clear CDN caches (if used) and wait for DNS propagation. If something looks inconsistent, re‑check in 24 hours.
Deliverable for this step
A secure, canonical blog loading only at your chosen URL with automatic redirects in place - ready to start a free blog promotion push, publish confidently, and benefit from clean SEO signals on your free blog with custom domain.
Step 6: Publish Your First Post and Essential Pages
Your first post (structure)
Start strong with a clear promise in the H1
Example: “How to Start a Free Blog With a Custom Domain in 20 Minutes”
Use scannable H2/H3s to organize steps or ideas
Intro (problem → outcome), Step-by-step, Pro tips, FAQs, CTA
Keep paragraphs short (1–3 sentences) and add visuals
Include 1 image per 400–600 words, use descriptive filenames and alt text
People‑first writing that solves a real problem
Be specific, cite examples, show screenshots or GIFs where allowed
Add a call to action (one clear next step)
“Comment with your domain choice,” “Subscribe for weekly tutorials,” or “Start your free blog on BlogBowl”
Optional BlogBowl assist
Use AI Outline for a draft, insert internal links to your About/Contact pages, and let embedded media auto‑optimize
Quick template you can copy:
H1: Your promise
Intro: Why this matters + who it’s for
H2: Step 1
H2: Step 2
H2: Step 3
H2: Pro tips / common pitfalls
H2: FAQs (2–4 concise answers)
H2: Call to action (subscribe, comment, next guide)
Must‑have static pages (for trust and compliance)
About
Who you help, your experience, and what readers can expect
Add a small headshot and a 1‑sentence value statement
Contact
Email form + links to your social profiles
If you use a domain email (you@yourname.com), display it prominently
Privacy + Terms
Data practices, cookies, and disclaimers
If you plan to monetize (ads/affiliate links), include disclosure language now so you’re covered later
Pro tip: Link these pages in your header/footer navigation on day one for crawlability and user trust.
On‑page SEO essentials per post
Slug
Use a short, descriptive, hyphenated slug (e.g., /start-a-free-blog/)
Titles and descriptions
Meta title: include the primary keyword near the start
Meta description: a compelling 150–160‑char summary that sets expectations and invites clicks
Headings
One H1 per page, then logical H2/H3 hierarchy
Images
Descriptive alt text that explains the image context (not keyword stuffing)
Internal links
Link to relevant posts/pages (About, Contact, related tutorials)
Add 2–4 internal links per 1,000 words to help readers and crawlers
Technical checks
Ensure the canonical URL matches your chosen host (www or non‑www)
Verify your post appears in the XML sitemap
SEO copy prompt you can reuse:
“In 155 characters, write a benefits‑driven meta description for [topic] that includes [primary keyword] and a clear outcome.”
Deliverable for this step
One published post and three core pages live:
1 blog post that solves a real problem
About page
Contact page
Privacy + Terms pages
When you create your own blog free on BlogBowl, you can publish confidently - your fast templates, clean HTML, and automatic internal linking set you up to rank sooner. Next, you’ll promote your free blog with custom domain and start compounding traffic with consistent posts.
Step 7: SEO, Analytics, and Newsletter - Set It and Scale It
Search Console and indexing
Verify your domain property in Google Search Console (DNS verification recommended for full-domain coverage).
Submit your XML sitemap (e.g., /sitemap.xml) and monitor Indexing, Coverage, and Page Experience reports.
Repeat verification and sitemap submission in Bing Webmaster Tools for broader visibility.
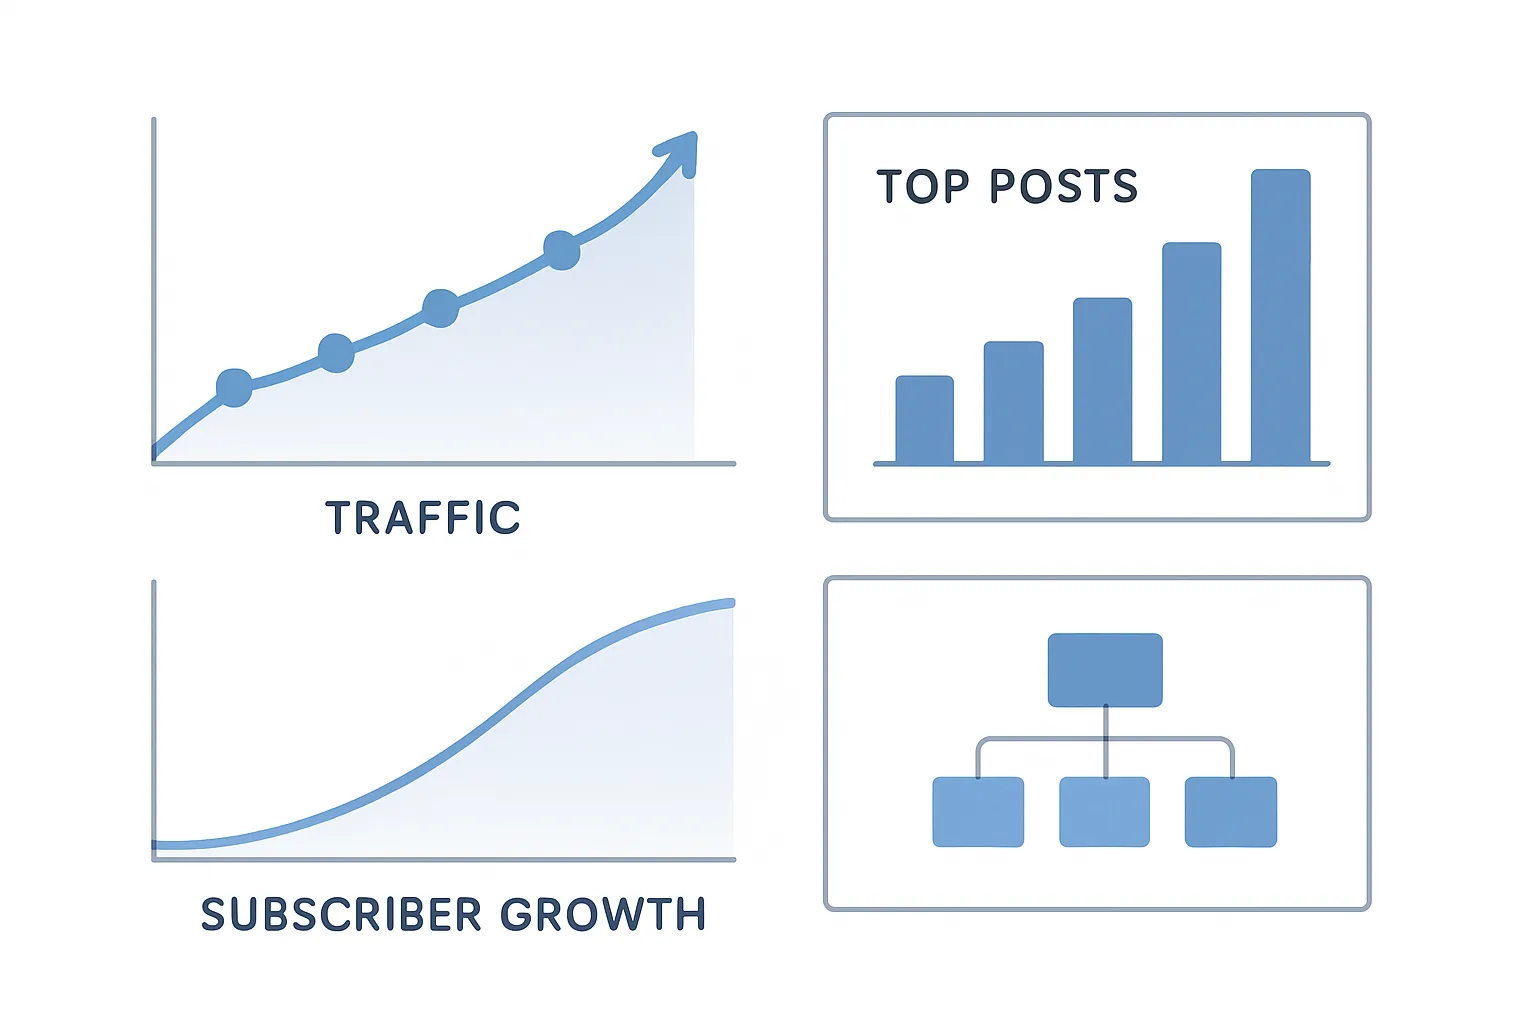
Analytics that respect privacy
Turn on BlogBowl’s built‑in analytics to track pageviews, sources, and top content without extra scripts.
Optionally add Google Analytics 4 (GA4) if you need granular funnels, events, and attribution.
Newsletter essentials
Place a simple homepage form and inline post CTAs (after intro and before conclusion).
Create a 3‑email welcome sequence:
quick win tutorial, 2) best resources/roadmap, 3) reply‑worthy question + next step.
Send a weekly roundup; keep send days consistent.
Automation edge with BlogBowl
Enable AI keyword research to find low‑competition topics and cluster ideas.
Turn on automatic internal linking to strengthen topical authority and reduce orphan pages.
Use auto‑generated images and embeds to enrich content while saving production time.
Deliverable for this step
Verified Search Console and Bing properties, live analytics tracking, and newsletter capture activated - so your free blog with custom domain can grow on autopilot.
Step 8: Promotion and Monetization (Zero or Low Budget)
Free promotion flywheel
Share each new post on 1–2 social channels where your audience already hangs out (quality > quantity).
LinkedIn: post a 3–5 bullet “mini playbook” + link in first comment.
X/Threads: thread your H2s with 1 actionable tip per tweet/post.
Pinterest: vertical graphic with a how‑to angle.
Join niche communities (Reddit, Discord, Slack, industry forums) and be helpful first.
Post answers, not links; earn trust. Share your guide when it truly solves a thread.
Save “evergreen answers” as reusable snippets you can adapt later.
Repurpose once, publish everywhere:
Turn H2s into a simple carousel; record a 60‑second summary video; post 1 key chart or checklist.
Schedule a 2–3 day drip (launch day + follow‑ups) to extend lifespan.
Track what works:
Use UTM tags on links (utm_source, utm_medium, utm_campaign).
Review top referrers in BlogBowl analytics weekly; do more of what compounds.
Early monetization paths
Affiliate links on helpful tutorials and reviews (always disclose).
Add comparison tables, pros/cons, and “who it’s for vs. not for.”
Link to multiple vendors where appropriate to maximize relevance.
Lead magnets → email nurture → service/product pitch.
Offer a template, checklist, or mini‑course aligned to the post.
3‑email sequence: quick win → roadmap/resources → soft pitch with proof.
Ads only after steady traffic.
Avoid clogging UX early; prioritize trust, speed, and clean layout.
Consider sponsor pilots (newsletter or post) once you have consistent opens/traffic.
Leverage BlogBowl growth features
Automatic internal linking increases pageviews/session and distributes authority to new posts.
Backlink exchange network earns safe, relevant links at scale (opt‑in; review before accepting).
Multi‑blog support: run a product blog, help center, and changelog - cross‑link for depth and discoverability.
Built‑in newsletter + analytics: capture subscribers, measure sources, and double down on top channels.
Deliverable for this step
A lightweight promotion checklist you’ll repeat for each new post:
Draft 1 carousel and 1 thread using your H2s.
Post on your two primary channels with UTM‑tagged links.
Answer 3–5 relevant community questions this week; share your guide only when it solves the question.
Add 2–4 internal links from older posts to the new one (BlogBowl can automate).
Add 1 contextual affiliate link or a lead magnet relevant to the post.
Email your list: problem → promise → key takeaway → CTA.
Review analytics in 72 hours; pin a top‑performing post and republish the carousel on a second network.
Troubleshooting: Domains, DNS, and SSL (Quick Fixes)
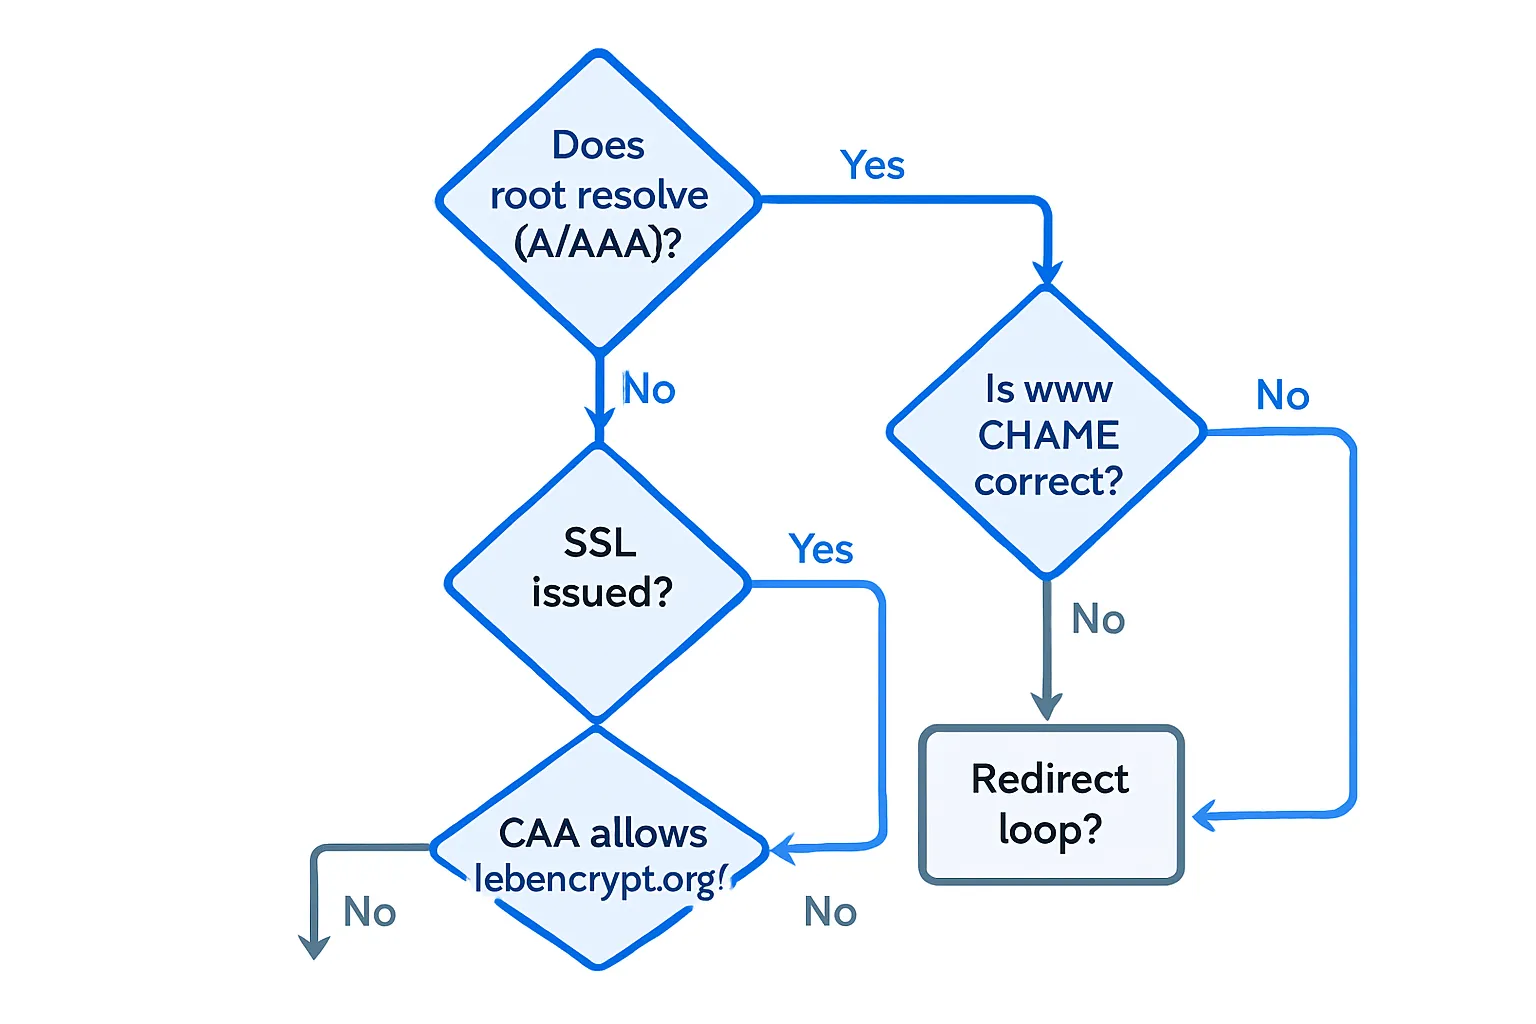
Domain won’t verify
Ensure TXT token is at root (@), not www
Remove conflicting old records; lower TTL (300–600s) and try again
If using Cloudflare, temporarily gray‑cloud DNS for verification
www/non‑www mismatch
Add a 301 redirect in your platform; ensure only one host resolves with 200 OK
Update XML sitemap and canonical tags to the preferred host
SSL not issuing
Wait for propagation; confirm A/CNAMEs point to the correct hosts
If using CAA records, allow the CA your platform uses (e.g., letsencrypt.org)
Check that port 80/443 are reachable (no restrictive firewall in front)
Redirect loops or mixed content
Clear caches/CDN; purge and retest
Update hardcoded http assets (images, JS, CSS) to https
Use curl -I and browser devtools to inspect redirect chains and blocked content
Propagation patience
Global DNS can take minutes to several hours; re‑test with a DNS checker
Validate with multiple resolvers (e.g., Google 8.8.8.8 and Cloudflare 1.1.1.1)
When to contact support
Persistent 4xx/5xx errors
Certificate errors after 24 hours
Unclear or conflicting DNS records you can’t remove
Deliverable for this step
A stable, secure site on your canonical domain, with SSL active and clean redirects.
Conclusion: Launch Your Free, Custom‑Domain Blog With BlogBowl Today
You’ve seen the fast, free path to a professional blog with your own URL, HTTPS, analytics, and newsletter - no code required. With BlogBowl, you can start a free blog, create your own blog free of technical hurdles, and ship confidently on day one.
BlogBowl gives you the unfair advantage: blazing‑fast SEO templates, AI‑powered content and internal linking, built‑in analytics and email, and friction‑free custom domains. It’s the simplest way to run a free blog with custom domain, scale content, and rank.
Ready to grow traffic and authority on autopilot? Create your free blog and connect your domain with BlogBowl now at blogbowl.io - launch in minutes, scale for years. Create free blog momentum today, and create your own URL that your audience will remember.