
-%20step-by-step%20+%20SEO%20tips-cover.webp)

Why add a custom domain to Blogger (Blogspot)?
If you’re still on a yourblogname.blogspot.com address, switching to your own domain is one of the fastest upgrades you can make. A Blogspot custom domain immediately elevates your brand and gives you more control over your domain blog future - even if you later move platforms.
Brand trust and memorability: A short, clean URL looks professional and is easier to share and remember.
Portability: You own the domain, so you can take your audience with you if you ever move off Google Blogger.
Professional email options: Use hello@yourdomain.com for consistent branding across your marketing.
Analytics consistency: Keep one canonical domain for clean, long-term data in Google Analytics and other tools.
SEO upside: Blogger uses 301 redirects from your blogspot address to your custom domain, preserving link equity. Enabling HTTPS adds a modern trust and ranking signal that users and search engines expect.
"Over 95% of Chrome browsing time on Android and ChromeOS is over HTTPS." - Source
By the way, BlogBowl plugs in seamlessly with your custom domain too - so once your Blogger own domain is live, you can automate SEO-friendly content, internal linking, and analytics without touching code. But first, let’s connect your Google Blogger domain the right way.
What you need before you start
A Blogger blog ready to publish (your current my blog google / blogspot site)
A registered domain (any registrar works)
Access to DNS (or someone who can update it for you)
10–30 minutes of setup time, plus DNS propagation (can take 24–48 hours)
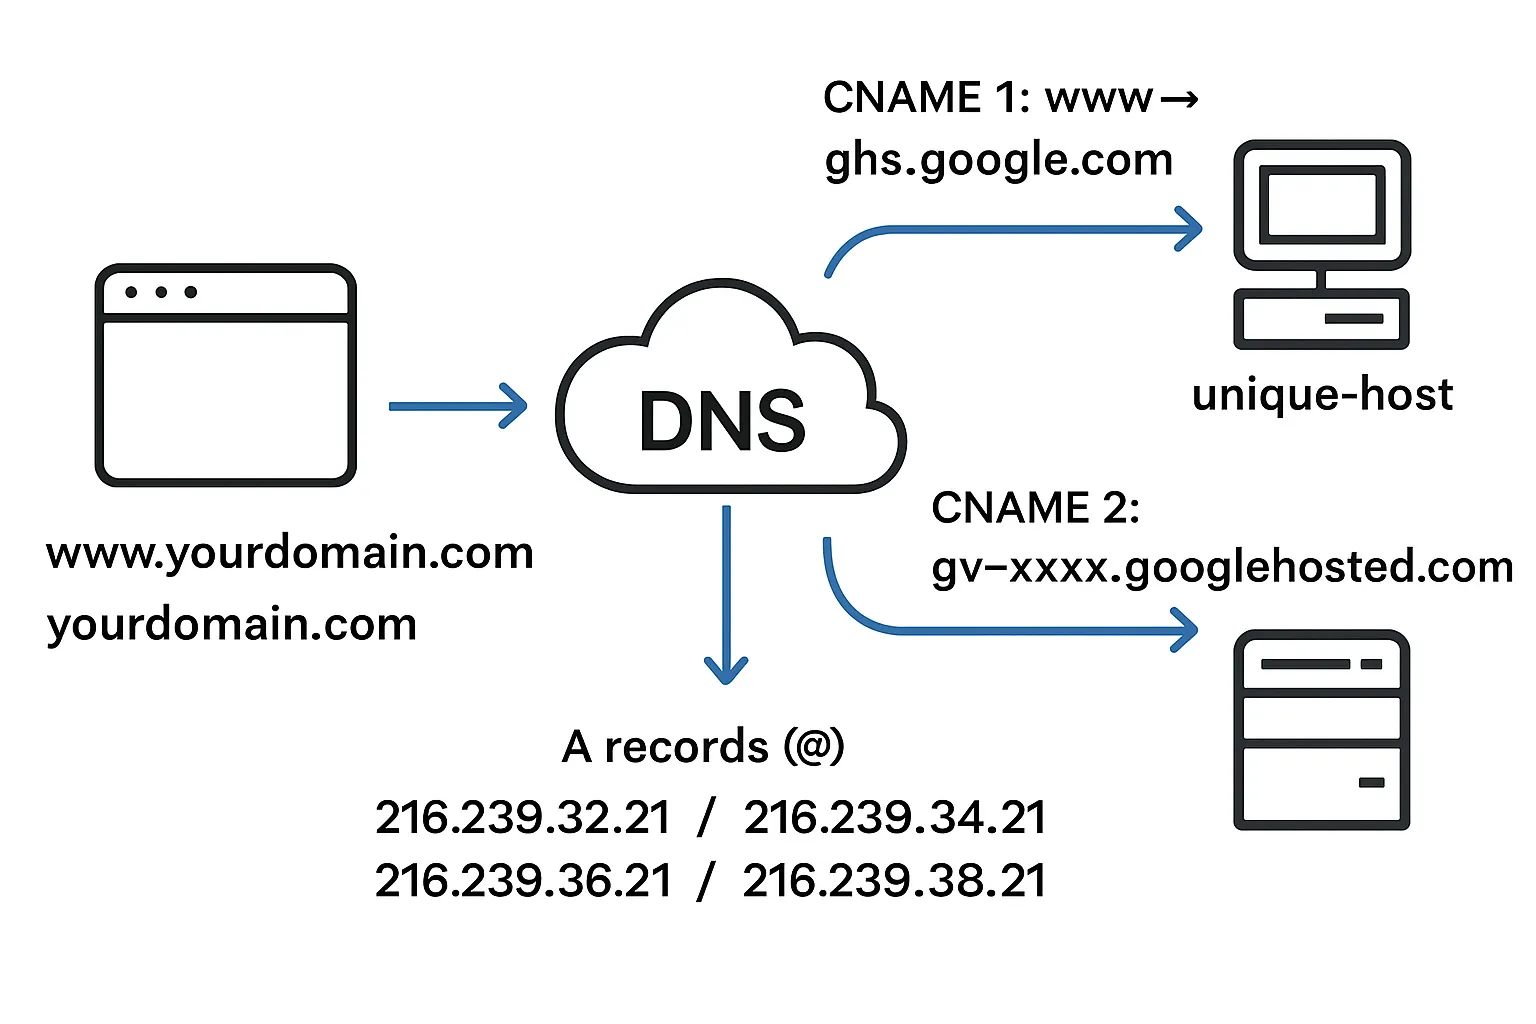
DNS in 60 seconds: CNAME vs A records
CNAME for www: Points your www subdomain to ghs.google.com so Blogger can serve your site.
Second CNAME (unique token): A verification record Blogger gives you to prove domain ownership.
A records for apex: Make the root domain (yourdomain.com without www) resolve correctly.
What we’ll do in this guide
Add the domain inside Blogger to generate the two CNAMEs
Update DNS (CNAMEs + A records for the root)
Turn on HTTPS and set redirects (non-www to www or vice versa)
Preserve SEO and verify in Google Search Console
Troubleshoot and validate your setup
Quick-start: add a custom domain in Blogger (Blogspot) - video overview
Follow this 3-minute walkthrough (turn on captions in the player) to add a custom domain in Blogger end-to-end, including DNS updates and enabling HTTPS.
Open Blogger → Settings → Publishing → Custom domain
Enter your domain using www (for example, www.yourdomain.com)
Blogger shows 2 CNAME records:
www → ghs.google.com
unique host (token) → gv-xxxxx.googlehosted.com
Add both CNAMEs in your domain registrar’s DNS (this connects your Blogspot custom domain)
Optional: add 4 A records for apex (@) → 216.239.32.21, 216.239.34.21, 216.239.36.21, 216.239.38.21
Return to Blogger → Save → Enable HTTPS → Enable HTTPS redirect → Enable “Redirect domain” (apex → www)
Pro tip
If CNAMEs don’t appear, save again with the www version, or use Google Search Console to view the token details for verification.
"To use a custom domain with Blogger, you must add two CNAME records (www → ghs.google.com and a unique token → gv-xxxx.googlehosted.com) in your domain’s DNS." - Source
Step 1: Add your custom domain inside Blogger
Go to Blogger Dashboard → Settings → Publishing → Custom domain
Enter the domain as www.yourdomain.com (www is required to generate the CNAME pair)
Click Save; Blogger will display two CNAMEs:
CNAME 1: www → ghs.google.com
CNAME 2: unique host (e.g., abcdefgh) → gv-abc123.googlehosted.com
Tips:
Enter only the domain (no http:// or https://, no trailing slash).
Seeing an error after Save is normal - Blogger shows the CNAMEs in that message so you can add them to DNS.
If CNAMEs don’t appear
Try saving again with the www version (for example, www.yourdomain.com).
Or open Google Search Console → select the property for your domain → view verification details → copy the “Host” and “Points to” values (the gv-… token).
Keep this tab open
You’ll need to copy these exact values into your DNS in the next step to complete your Blogspot custom domain (add custom domain in Blogger) setup.
Step 2: Update DNS (Registrar/Provider)
Sign in to your domain registrar (e.g., GoDaddy, Namecheap, Cloudflare, Squarespace Domains, or your provider).
Open DNS Manager or Zone Editor for your domain.
Add the two CNAMEs exactly as shown in Blogger (values are unique to your blog).
Optional (recommended): add four A records so the apex/root domain (yourdomain.com) works without www.
TTL
Use your provider’s default TTL or set 5–15 minutes during setup to speed up propagation.
Don’t duplicate/conflict
Remove any existing A/CNAME records that conflict with @ or www before adding the Blogger records.
DNS records to add for Blogger
Host/Name | Type | Value/Target | TTL | Purpose |
|---|---|---|---|---|
www | CNAME | ghs.google.com | Default | Points www to Blogger |
unique-host (from Blogger) | CNAME | gv-XXXX.googlehosted.com | Default | Ownership + routing |
@ | A | 216.239.32.21 | Default | Apex routing |
@ | A | 216.239.34.21 | Default | Apex routing |
@ | A | 216.239.36.21 | Default | Apex routing |
@ | A | 216.239.38.21 | Default | Apex routing |
Step 3: Verify, turn on HTTPS, and set redirects
Return to Blogger → Settings → Custom domain → Save (DNS may need time to propagate before Save succeeds).
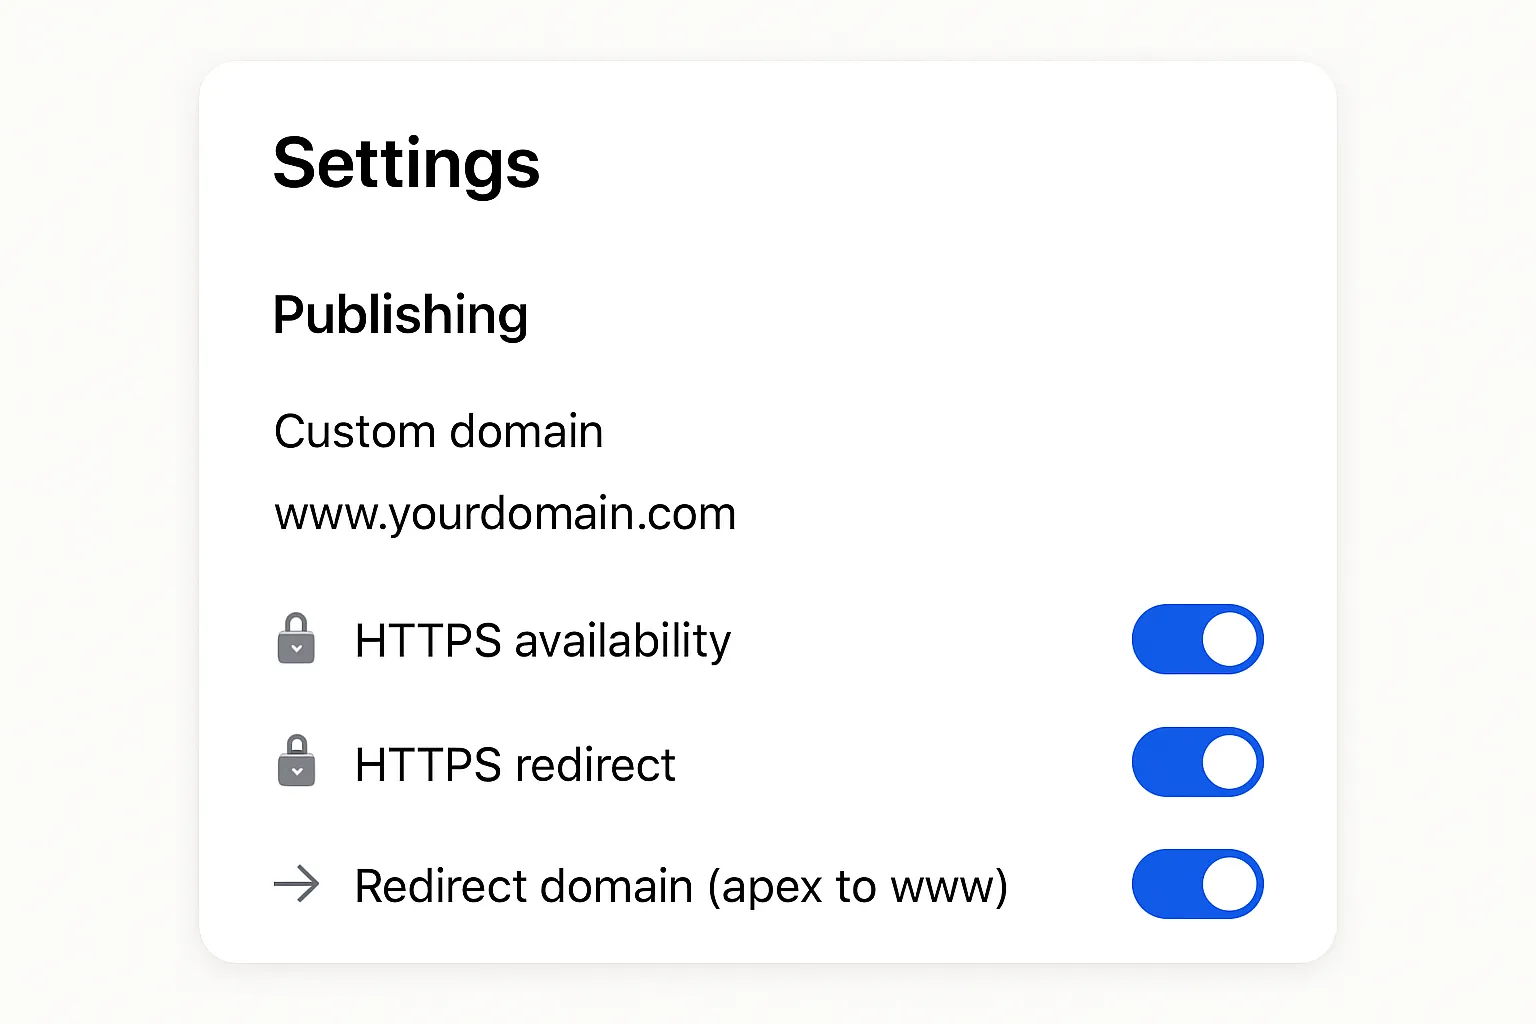
Enable HTTPS
Turn ON “HTTPS Availability” to provision your free certificate.
Turn ON “HTTPS Redirect” so all HTTP requests automatically redirect to HTTPS.
Redirect apex/root → www
Enable “Redirect domain” so yourdomain.com forwards to www.yourdomain.com for a single canonical URL.
Mixed content check
If you previously embedded images, scripts, or stylesheets with http://, update them to https:// to avoid browser warnings.
Re-check after 15–60 minutes
Visit:
Confirm both redirect to https://www.yourdomain.com
"The probability of bounce increases 32% as page load time goes from 1s to 3s." - Source
Step 4: Preserve SEO (Blogspot → Custom domain)
What Blogger does for you
Automatic 301 redirects from yourblog.blogspot.com → https://www.yourdomain.com
Canonicals and feed rewrite handled by Blogger
"Use 301 redirects to tell search engines and users that a page has moved permanently." - Source
What you should do
Verify the new domain in Google Search Console (add a Domain property)
Submit sitemap at https://www.yourdomain.com/sitemap.xml (Blogger provides it)
Keep the old blogspot property in GSC for a few weeks to monitor redirects
Update internal links in posts/templates to the https://www.yourdomain.com format
Update major backlinks (social profiles, nav menus, email signatures, paid ads)
Update GA4 data streams and any pixels to the new domain
Consider HSTS preload later (only after everything is stable and always HTTPS)
Track the move
Monitor 404s, crawl errors, and coverage in GSC
Watch canonical URLs and indexed pages; expect temporary volatility
SEO migration checklist (Blogger custom domain)
Task | Where to do it | Status |
|---|---|---|
Add new domain property | Search Console | [ ] |
Submit sitemap | Search Console | [ ] |
Update internal links | Blogger/theme | [ ] |
HTTPS + redirects ON | Blogger settings | [ ] |
Update analytics/pixels | GA4/ads | [ ] |
Update key backlinks | Social/website | [ ] |
Monitor 404s/coverage | GSC | [ ] |
Troubleshooting: common issues and fixes
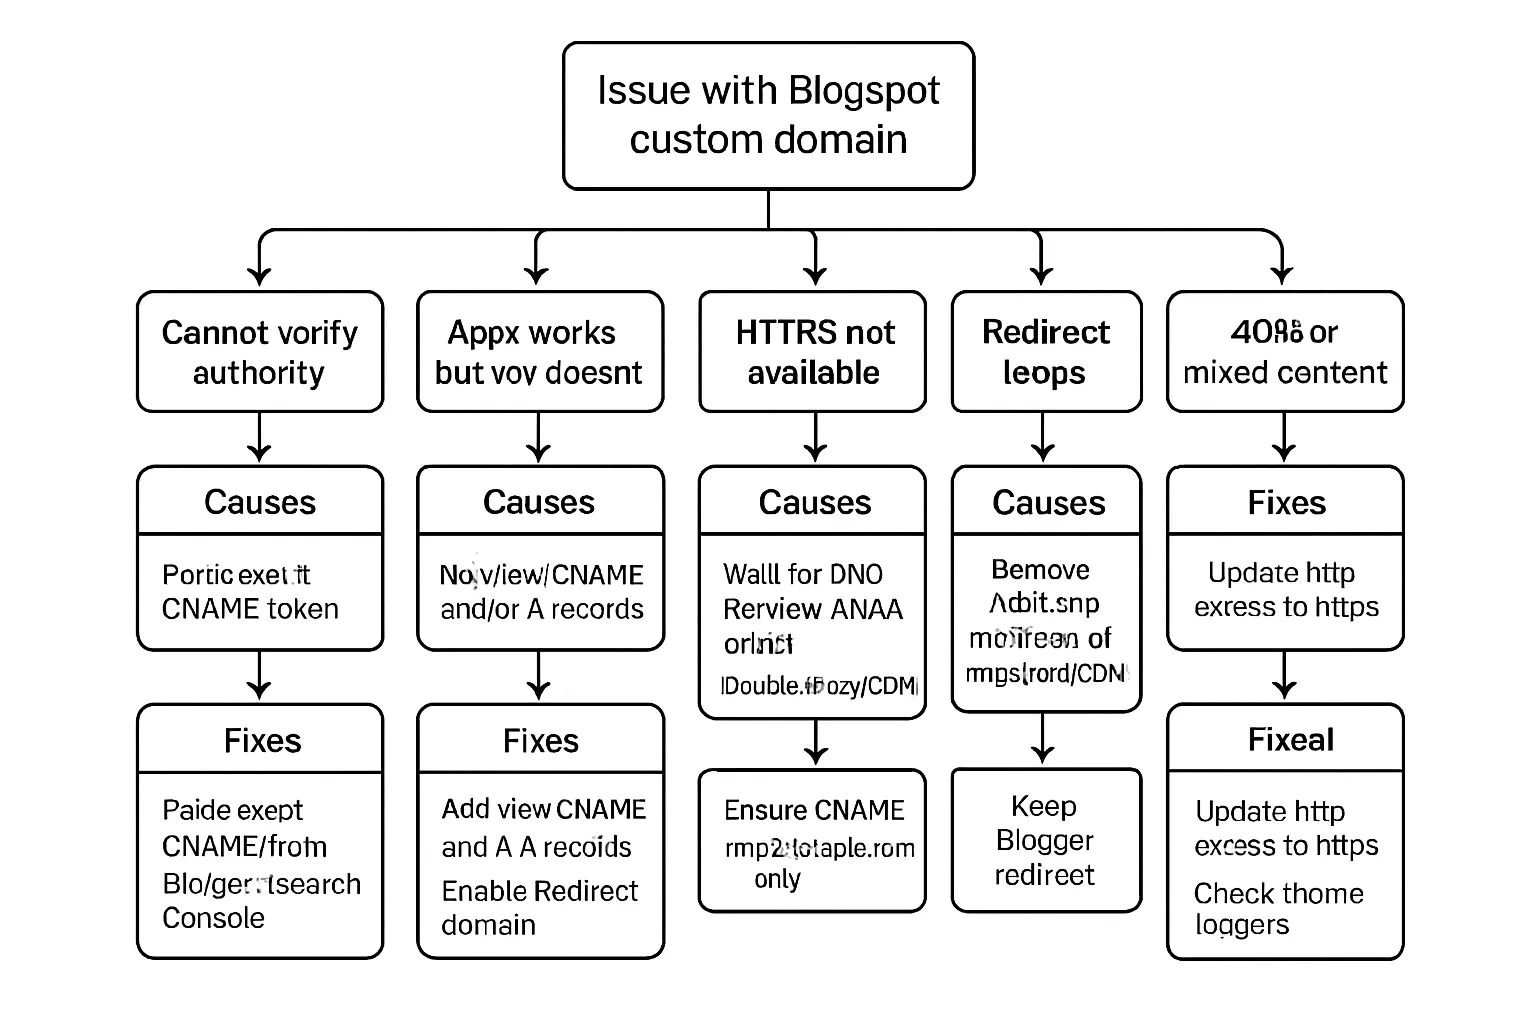
“We are unable to verify your authority to this domain”
Likely cause: missing or incorrect unique CNAME; typo in Host/Target.
Fix: paste the exact host/token pair from Blogger or Search Console; remove conflicting records; lower TTL; wait 15–30 minutes and retry Save.
Apex (yourdomain.com) works but www doesn’t (or vice versa)
Cause: missing CNAME for www or missing A records/redirect.
Fix: add www CNAME; add four A records or enable “Redirect domain”.
HTTPS not available / stuck provisioning
Cause: DNS not fully propagated, AAAA/IPv6 conflicts, proxy/CDN interference.
Fix: wait, remove conflicting AAAA, temporarily disable orange-cloud/proxy, ensure CNAME points to ghs.google.com only.
Redirect loops
Cause: CDN rules or dual redirects at registrar + Blogger.
Fix: keep redirect at Blogger; remove duplicate rules elsewhere.
404s or mixed content
Fix: update old http:// assets to https://; check theme widgets.
How to validate quickly
DNS: dnschecker.org or whatsmydns.net for CNAME/A records.
HTTP: curl -I or httpstatus.io to confirm 301 → 200 over HTTPS.
Registrar-specific notes
GoDaddy/Namecheap
Ensure there are no parked or forwarding records that conflict with @ (apex) or www.
Delete any existing A or CNAME records that point @ or www to another host before adding Blogger’s records.
Keep MX records for email intact - don’t replace them when editing A/CNAME.
Cloudflare
Set DNS Only (gray cloud) for www and @ during initial setup so Blogger can verify and provision HTTPS.
After HTTPS is live, you can re-enable the proxy (orange cloud) if desired.
Use one Redirect Rule (or legacy Page Rule) only if you are not using Blogger’s built-in “Redirect domain.” Avoid layering multiple redirects.
Subdomain vs apex (www vs root)
Prefer using www for reliability because CNAMEs are allowed on subdomains and handle platform changes smoothly.
The apex/root (yourdomain.com) cannot be a CNAME at most providers, so you must:
Add the four A records (216.239.32.21/34.21/36.21/38.21), or
Use ALIAS/ANAME (if your DNS supports it) to point the apex to ghs.google.com.
Internationalized domains (IDNs)
If your domain includes non-ASCII characters, enter the Punycode form (xn--…) in DNS.
Blogger works fine with IDNs once DNS resolves and verification CNAMEs are correct.
Email on your domain
MX records for email are separate from your web routing. Adding Blogger DNS entries won’t break email as long as you leave MX records unchanged.
Add or preserve SPF, DKIM, and DMARC to protect deliverability.
Avoid placing a conflicting CNAME or A at @ that would override your MX configuration.
Performance tips
Use a short TTL (5–15 minutes) during setup and switch back to the default once everything is stable.
Keep third‑party scripts minimal to reduce blocking time.
Compress and properly size images; consider next-gen formats (WebP/AVIF).
Lazy-load embeds and below-the-fold media to improve perceived speed.
FAQs: Blogger own domain and Blogspot custom domain
Will this hurt my SEO?
No. Blogger uses 301 redirects from your blogspot URL to your custom domain, preserving link equity and signals. Keep HTTPS and redirects enabled for best results.
Do I need the www version?
Recommended. www allows a CNAME (www → ghs.google.com), which is more reliable. If you use only the apex (yourdomain.com), you must add four A records or use ALIAS/ANAME if your DNS supports it.
How long does it take?
DNS can update within minutes, but allow up to 24–48 hours for full propagation. HTTPS certificates may take additional time to provision after DNS resolves.
Do I need to buy Google Blogger domain services?
No. You can use any registrar. Just configure DNS correctly (two CNAMEs and optional A records) and save your custom domain in Blogger.
My blog doesn’t appear on Google (“my blog Google”)?
Publish a few high-quality posts, verify your new domain in Google Search Console, submit the sitemap at https://www.yourdomain.com/sitemap.xml, and give Google time to crawl and index.
Can I use blog.yourdomain.com instead of www?
Yes. Add a CNAME for blog → ghs.google.com, then set blog.yourdomain.com as your custom domain in Blogger. If you also want the apex to work, add the four A records or enable a redirect to blog.yourdomain.com.
Conclusion: your Blogger custom domain is live - now scale content and SEO with BlogBowl
You did it. Your Blogspot custom domain is connected, HTTPS is enabled, and SEO signals are preserved. Next steps are simple: publish consistently, monitor Google Search Console, keep URLs clean and canonical, and build authority with quality content and smart internal linking.
If you want the easy button for content and growth, BlogBowl does the heavy lifting for you:
Launch a professional, SEO-optimized blog in under 60 seconds
Automated article creation, keyword research, and internal linking powered by AI
Built-in newsletter and privacy-friendly analytics
Lightning-fast templates designed to rank in Google and AI-driven search
Effortless custom-domain integration - perfect if you just added a custom domain in Blogger
Manage multiple blogs, invite authors, and scale your content engine without code
Focus on your content and audience; BlogBowl handles the tech, speed, and SEO automation - so your Google Blogger domain becomes a true growth channel.
Try BlogBowl: https://www.blogbowl.io